I heart to create!
My favorite medium to use = beads
A good friend of mine, Noelia, taught me how to Pearl Knot a few weeks ago
and,
since then,
I have been dreaming of all the cool jewelry
I am going to make.
≈≈≈≈≈≈≈≈≈≈≈≈≈≈≈
Here is what she taught me:
First, you need pearls...
there are so many sizes, shapes & colors...
just choose the ones you like!

Next, you will need:
2 crimps, 2 u clasps, crimping pliers, tweezers & silk thread


TIP *you can also use liquid stitch to strengthen the knots if you like

≈≈≈≈≈≈≈≈≈≈≈≈
OKAY
Here we go!
Take the silk string
TIP *I buy mine with the needle already threaded
On the fresh end of the string, you will have the starting knot,
thread on 1 crimp.
Take 1 u clasp, thread it on the string creating a loop as shown below.
Make sure when you are done threading the u clasp to also thread the needle back through the crimp.
Then, take the crimping pliers and fasten the crimp in place.
(this starts the beginning of any necklace)

Now you are ready to start adding beads!
take the first bead - string it on tight up against the crimp.
(as shown below)
Time to make your first knot...
First, take the string in hand and let the bead dangle.
Wrap the string around your fingers creating a loop.
Pull the remaining string through the loop to start creating a knot,
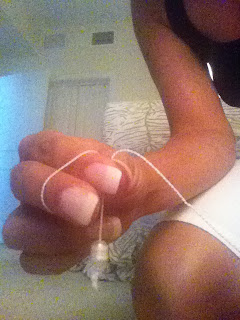
with your other hand, pinch the part of the loop where the knot
is forming so that it doesn't create a tight knot.
YET...
Now, take the tweezers and go through the circle and grab the area of string just above the bead.

Holding the string above the bead tight with the tweezers,
slide the string to form a knot around the tweezer end.

Carefully, take the tweezers out of the knot and leaving the knot loosely formed above your bead.
To finish it off, take the tweezers and push the knot flush
with your bead tightening it to keep the bead in place.

TIP *you can knot it only once or apply more knots to make the appearance of the knot larger
TIP *you can apply the bead glue on each knot if you like to keep the knot tight and strong
Continue with each new bead addition as shown below.

(keep going until the necklace is at desired length)

When you get to the point where you are ready end the necklace:
You will do the same steps as above adding the crimp and then the u clasp to complete the necklace.
From there, add the desired closure pieces of your choice.
One to each side using small needle nose pliers to open and close the circles.
and, ta-da! here is the final product!

Knotting is all about practice makes perfect...
It took me a few times to really get it so be patient and keep trying until you get it.
Have fun!
and, I would love to see how yours comes out!
Very cool! I have a bunch of jewelry making stuff that I haven't pulled out in ages. Hmm...
ReplyDelete